Monday, September 30, 2013

Gluten Free, Sugar Free Brownies

    A couple of weeks ago, I made homemade brownies from a recipe on the box of Baker's Unsweetened Chocolate. It tasted so good. But it had 2 strikes against it: 1. It contained sugar and 2. It contained flour (although organic).
   The brownies never tasted better to me. I have cut way back on sugar consumption and my body seems to know when I am missing this lovely, terrible ingredient, unfortunately.
   The flavor of the brownies was stuck in my memory, so I decided to make my own version of these brownies, but without using real sugar and white flour. Here is the original recipe:

One Bowl Brownies


1
pkg.  (4 oz.) BAKER'S Unsweetened Chocolate
3/4
cup  butter or margarine
2
cups  sugar
3
 eggs
1
tsp.  vanilla
1
cup  flour
1
cup  coarsely chopped PLANTERS Pecans

HEAT oven to 350°F.
LINE 13x9-inch pan with foil, with ends of foil extending over sides. Spray foil with cooking spray.
MICROWAVE chocolate and butter in large microwaveable bowl on HIGH 2 min. or until butter is melted. Stir until chocolate is completely melted. Stir in sugar. Blend in eggs and vanilla. Add flour and nuts; mix well. Pour into prepared pan.
BAKE 30 to 35 min. or until toothpick inserted in center comes out with fudgy crumbs. (Do not overbake.) Cool completely. Use foil handles to remove brownies from pan before cutting to serve.   
So, here is my version of the recipe:
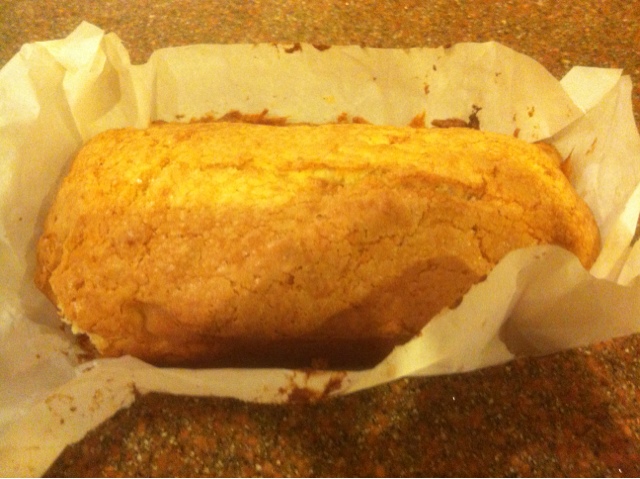
One Bowl Brownies Made Gluten-Free and Sugar-Free
2 squares Baker's unsweetened chocolate
3/4 stick butter
1 cup xylitol
2 eggs
1/2 tsp. vanilla
1/2 cup Gluten free flour
handful of chopped walnuts
  Let the butter and chocolate squares melt in a pot on low heat, until melted. Add xylitol and stir. Beat eggs and add. Stir in vanilla and add flour. Stir well. Add chopped nuts and pour mixture into 8X8" pan (I used a glass pan, buttered, lined with parchment paper, and buttered). Bake for 30-35 minutes. Cool and cut up.
*note: I also put Ghiradelli bittersweet chocolate chips (60% cacao) on top of brownies, and let them melt, then spread them around. There isn't too much sugar in these chips and they have a high level of cacao. The higher, the better).
Maybe, in the future, I will use almond flour, instead of gluten-free.

Tuesday, August 13, 2013

Simple Recipe for Cooked Chicken and Chicken Broth

Cooked Chicken and Chicken Broth

1 whole chicken (it can be cut up or whole)
3-4 cups water
1 bay leaf
2-3 carrots
1/2 onion
1 celery stalk
Garlic salt
Seasonings (I use a French type of seasoning) to taste

   Grease the inside of a slow cooker with softened butter or oil. You can also use a stove top pot to cook this in, but cooking time will be shorter and you will have to tend to the pot more often. If you have the insides of the chicken, like the liver and kidneys, throw them in the pot as well. Pour water over the chicken and in a food processor chop up the carrots, celery, and onion and place those in the slow cooker or pot along with the bay leaf, salt, and seasonings, if using. Set the slow cooker on low for about 6-8 hours, or longer. If cooking on the stove, cook on simmer or low boil for a couple of hours until the meat falls off the bones.
   Take the meat off the bones, after the meat has cooled off. Eat immediately or store meat and broth.
  You could use cut up turkey parts instead of chicken. You can use the broth to make soup or gravy to use in other recipes. Store leftover broth and meat in Mason jars and freeze. Broth and meat can be frozen together, or separately. If storing separately, add some broth to the chicken so it doesn't get freezer burn.
Some suggestions for chicken and broth:
Chicken noodle soup
Chicken rice soup
Chicken soup
Chicken pot pie
Chicken and gravy
Chicken stew
Chicken and dumplings
Chicken and rice
Chicken and noodles
Chicken ala king


Thursday, August 8, 2013

Summer Berry Smoothie - For Dummies

For those of you who love smoothies but hesitate to make your own because of the work involved, here is a simple recipe for a smoothie made with berries. It's easy to make, yet nourishing.
Summer Berry Smoothie - For Dummies

Sunday, May 12, 2013

Two New Menu Items at Our Household

   I am proud to announce that I experimented with two different recipes this week and had success in both of them. When I eat a meal, for example, a bowl of grits, I always eat smaller portions than what they serve in a restaurant, or even a standard recipe is too much for me to eat, so I devised a new recipe based from the old ones, but in smaller portions. Not only that, but I ground my own wheat, and corn this time.
   I ordered a rainbow type of popcorn from amazon.com and received it quickly. I also ordered wheat berries. I was researching on how to grind wheat on the internet, and one blogger recommended sifting the whole wheat through a fine strainer, then using the parts that don't get strained in making 'cream of wheat' hot cereal.
   When I make a recipe like this one, I use one half cup water (or water and milk) to two tablespoons of cream of wheat, and let it cook for a couple of minutes, then stir and let the mixture thicken. It is wonderful with maple syrup and butter (and some salt!).
   I ground my wheat and put it in the fridge. This morning I used two tablespoons to one half cup liquid and made cream of wheat from it, on the stove. It tasted marvelous.
   I also took the popcorn I got last week and ground that using my grain mill attachment on the Kitchen Aid mixer. I ran the grains through a couple of times, and they looked kind of rugged still. I intended to make cornmeal. This cornmeal would look a little different though, because the popcorn kernels were different colors. I planted some and they are coming up. Now I can even grow my own popcorn and make homegrown cornmeal.
  I used the 'cornmeal' just like I would if I were making grits. I used two tablespoons of grits to a half a cup of liquid. I let them cook for a couple of minutes and viola, I have a bowl of multi-colored grits. Pretty cool. They tasted pretty good too, especially with cultured butter melted in them.

Homemade 'Cream of Wheat'

2 TBS. freshly ground wheat
1/2 cup liquid (milk, cream, water, or a mixture)

Combine all ingredients in a small pan. Heat until mixture starts to boil and stir. Let the mixture thicken and enjoy! Serves 1

Homemade 'Grits'

2 TBS. freshly ground popcorn
1/2 cup liquid (milk, water, cream or a mixture of these ingredients)

Combine all ingredients in a small pan and heat mixture until it starts to boil. Continue to cook and stir continually, until thickened. Serve with butter and cheese, if desired.


Sunday, January 20, 2013

Mounds Candy Bar Recipe from Recipe Chow

Recipe for Homemade Mounds Bars

I don't usually find a recipe I like and post it here, but I am going to do this for this particular recipe. I tried to 'pin' it to my Pinterest, but Pinterest doesn't believe there are any videos or pictures on this web page. What I don't understand, is that the web site with the recipe on it had some nice pictures on it. Here is the recipe for the homemade Mounds bars that are made without sugar, and are gluten free. Well, there probably is some sugar in the chocolate chips.

Mounds Candy Bars from Recipe Chow


Mounds Candy Bars from Recipe Chow

               ¾ cup dark chocolate 73%
               ½ cup shredded coconut
               ¼ cup coconut oil
               1 tablespoon agave nectar (if you want a sweeter filling, try 2 tablespoons                                     

Directions

1.                               Melt chocolate in a small pan over very low heat; you can use a double boiler if you wish and temper the chocolate
2.                               Using a small paint brush, coat the bottom and sides of a mounds candy mold
3.                               Place mold in freezer for 10 minutes to allow chocolate to harden
4.                               In a small bowl, combine shredded coconut, coconut oil and agave
5.                               Remove mold from freezer
6.                               Fill chocolate lined molds with coconut mixture
7.                               Paint chocolate over coconut mixture to cover bars
8.                               Place in freezer for 10 minutes to harden
9.                               Remove from freezer, turn mold upside down and pop mounds out of mold


Tuesday, January 15, 2013

Why I Eat Poundcake The Way I Do

I'm not a person who enjoys eating cake unless it is chocolate, but I must make an exception for Poundcake. You see, when I was a kid, my mom taught me about pound cake. She explained that you take pieces of the pound cake and squish them between your fingers or against a plate. That's why it is called pound cake. It is the only cake I eat like that and it tastes so good in either chocolate or any other flavor.